

This post is the first in a series of posts about technology tips that I wish I had known prior to going to law school.
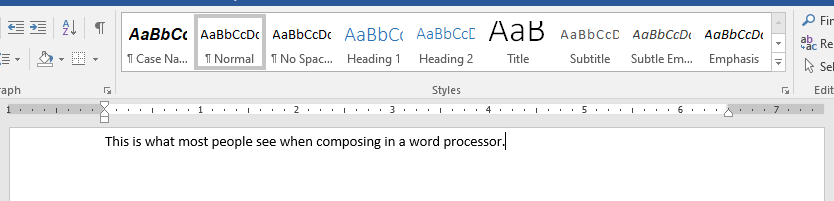
I am assuming that readers have some experience with drafting documents in a computer word processor, and have needed to format those documents to achieve a certain look. Early on, many of us accomplish this by laboriously highlighting each word we want to format a specific way and then either using keyboard shortcuts or icons in the tool bar to apply attributes until the font, size, emphasis, and alignment are all “just so.”
And then, we decide we want something to look different, so we have to go through and change the attributes in every single place that change is required. It’s tedious, time-consuming, and increases our opportunity for error. In short, this is a problem that it sure would be nice if there were a solution for. And there is!
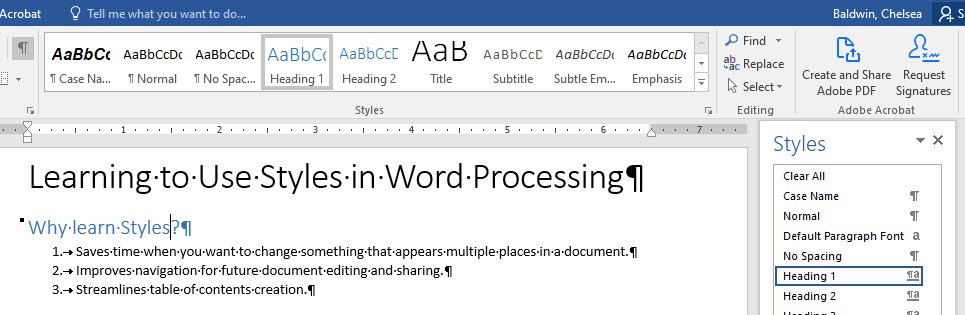
Why invest the time to learn styles?
- Mastering styles will enable you to make formatting edits in one place for application to your entire document so you have less manual searching and format changing.
- Applying styles also creates a navigation menu that you can use to jump between different parts of the document quickly. This can help you speed up editing of really long documents, and also improve the accessibility of your document for individuals who use screen readers.
- If you want to use the word processor’s built-in table of contents generator, the software needs you to apply styles so it knows which headings and page numbers to include in the table of contents.
- While it might not save time the first dozen or so times you use the feature, multiply it by the hundreds or thousands of times you’ll need to do similar work over your career and it will save you a lot of work.
How do I use styles?
Most word processors have an built-in set of styles, and conceptually, they function in pretty similar ways once you find the menus that the style commands are buried in regardless of whether you use Microsoft Word, Apple Pages, Google docs, or several other products.
Mindset
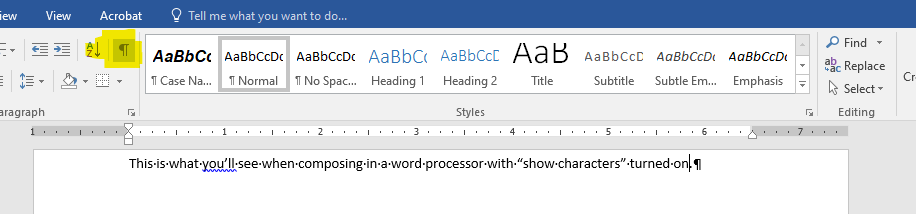
First, you might need to make a conceptual shift from a word-by-word formatting strategy in order to get styles to behave for you. A word processor applies styles to “paragraphs” instead of words. Thus, it might be useful to turn on “show characters” in documents so you can see the (usually hidden from human view) paragraph symbol at the end of each “paragraph.” To a word processor, a paragraph is any unit of text that is separated from other units of text with a hard return. Thus, not only are paragraph length blocks of text paragraphs, but so are headings, bullet points, and each item on a numbered list.
Basic Process
If you’re willing to use your word processor’s default styles that come with the program, applying them to your document is as simple as:
Step 1: highlight the paragraph(s) you want a style applied to, including the paragraph symbol that separates it from the next paragraph;
Step 2: select the appropriate style from the style Menu;
Step 3: Move on to the next chunk of text and repeat steps 1 & 2 until finished.
Modifying styles
However, if you need to customize the look of your text, you will need to find the software’s specific methods for updating the formatting of paragraph styles.
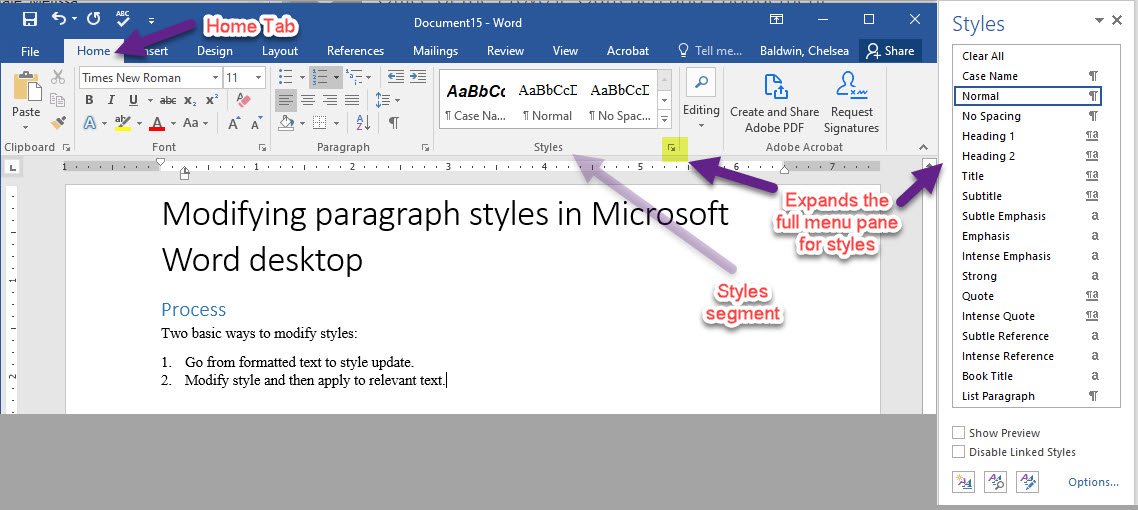
Modifying styles in Microsoft Word desktop
Unfortunately, Microsoft Word online does not allow you to modify styles at this time (although it will let you create new custom styles). But, you can customize styles in the desktop version of Word to match the requirements of your professors, local court rules, etc.
Microsoft Word’s default setup has a “Styles” segment installed on the menu bar of the Home tab. Several styles are preloaded and you can use or modify directly from there. However, there are a huge number of additional styles available if you expand the styles segment so that a Styles menu pops-up. Once you select Options and show all styles you have an extensive list of preconfigured styles that you can edit, without changing the labeling.
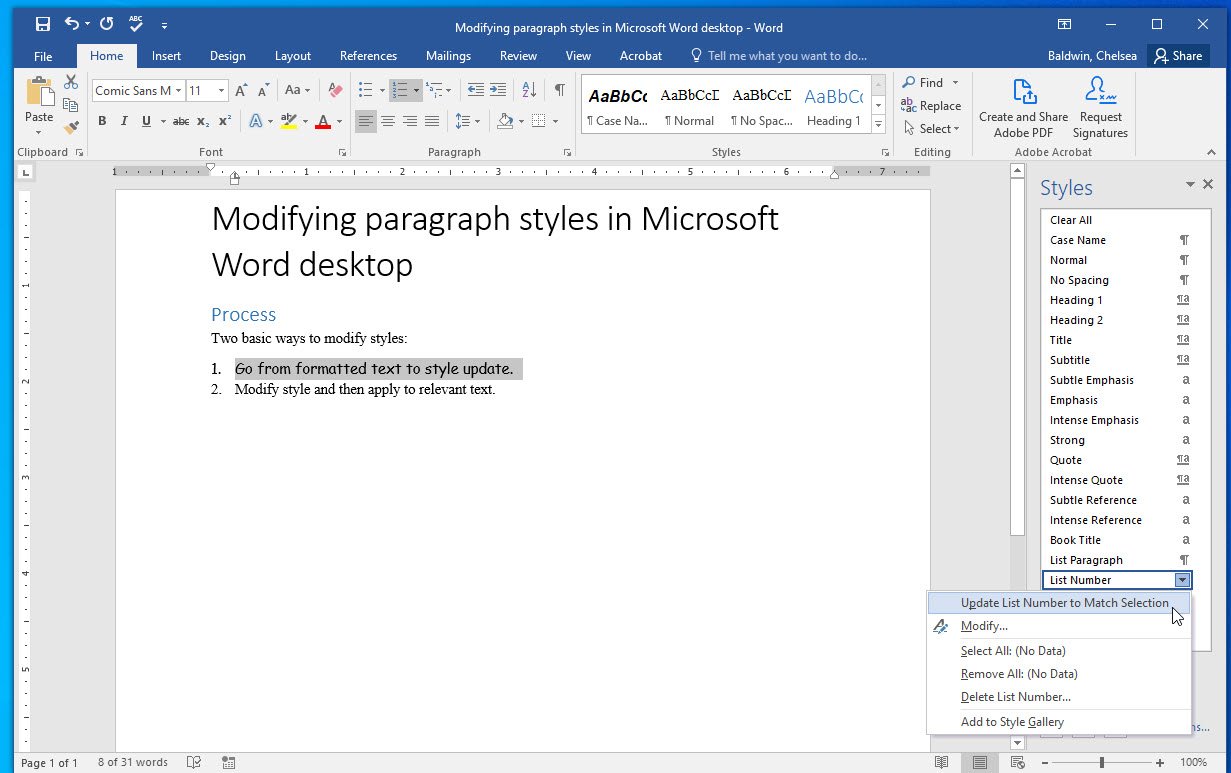
There are several approaches to modifying styles. However, to keep this post brief, we’ll discuss what to do when you have an already formatted document that you want to apply styles to so you can generate a navigation menu or a table of contents.
Right-click (or drop-down arrow) to “Update [style] to Match Selection.”
To take this approach, highlight the text that is already formatted to meet your requirements for similarly situated paragraphs, and then right-click or use the drop-down arrow to open up a menu that has the option “Update [style] to Match Selection.”
Learning to use the styles that come with your preferred word processor of choice will make your life easier as a writer and open up additional tools and functions that will also make your life easier as a writer.